Saturday, September 14, 2019

Awesomeness of ffmpeg

ffmpeg is a powerfuly CLI tool. It has helped me many times. Assuming that it is installed.

Question: How to covert a video file to an audio file using ffmpeg in Linux

$ ffmpeg -i input-video.mp4 output-audio.mp3
$ ffmpeg -i input-video.mp4 output-audio.wav 

Note: Supports most of the audio formats.

Question: How to increase the audio quality or amplfying the audio in a video  using ffmpeg.

$ ffmpeg -i 'input-video.mp4'  -vcodec copy -af "volume=30dB" 'output-video-30db.mp4'

set volume appropriately as 10/20/30/40 DB depeding on how much audio you need to amplify in your input-video file. This works amazing well. You would not believe it.

Tata, See you.

MKV - dual or multi audio in a singe video file

MKV is one the famous video format for the movie watchers/collectors online.
WIKI says The Matroska Multimedia Container is a free, open-standard container format, a file format that can hold an unlimited number of video, audio, picture, or subtitle tracks in one file.

I am fan of the following feature. You can choose the audio language during play back. It work cools on vlc player. This would avoid creating or downloading multiple times say if we want a movie in Tamil as well as English.

I was really surprised why YouTube or vimeo did not adopt to such kind of player. That can play multiple audios/language. Maybe it will come in future some day.  Currently we have only different language subtitles for one video with single audio track. The future is single video with multiple audio tracks. This could be a boon for video creators.

It would be nice to have a player like this below.  In this below player click the headphone icon -- you can change the lang of video ENGLISH or SPANISH.

https://paellaplayer.upv.es/demos/multi-audio-tracks/

You could create a such a video. But we need a player(as above) to play such video on the web or our website. I still have not figured out how to add paella player to my site.

On a side note. How do we create a such a video. It is easy. There is a tool called MKVToolNix GUI.

Sooner or later YouTube will have this feature.

Okay. more later. Tata.

Using GNU Parallel on Linux

Sometime ago I had created a C/C++ program to find the LAN machine/IP that is powered ON or OFF in our Departmental Computing Facility[DCF]. The local IPs have changed now.

The important thing was that program pings each machines/IP address one after another. It would take a lot of time. Recently, I have seen a cmd/package called parallel  that does it in one line linux command. Cool. I can add this to my bashrc which would need only 3 key stokes to find what I wanted.

If it is not installed already, do it

$ sudo apt-get install parallel


$ parallel --halt now,success=1 ping -c1 10.21.225.{1}{2} ::: 0 1 2 ::: 1 2 3 4 5 6 7 8 9 0

This is the one line cmd. Lets break it down and see what it says.

$ parallel echo {1}{2} ::: 0 1 2 ::: 1 2 3 4 5 6 7 8 9 0

what does the above command do. Prints all the numbers from 00 to 29. i.e echo 30 times.

echo 00
echo 01
...
echo 29

parallel does the same, but the order is immaterial.

But, to my purpose I used to check $? whether  0 or 1 or something in my old script. This is done smarter here.

--halt now,success=1 means stop running jobs even if one job is succeeded. WOW!


$ parallel --halt now,success=1 ping -c1 10.21.225.{1}{2} ::: 0 1 2 ::: 1 2 3 4 5 6 7 8 9 0 > /dev/null

I use the above line which prints only the IP I wanted. YAY!
Tata. See you. 

Sunday, August 18, 2019

Search your own old tweets

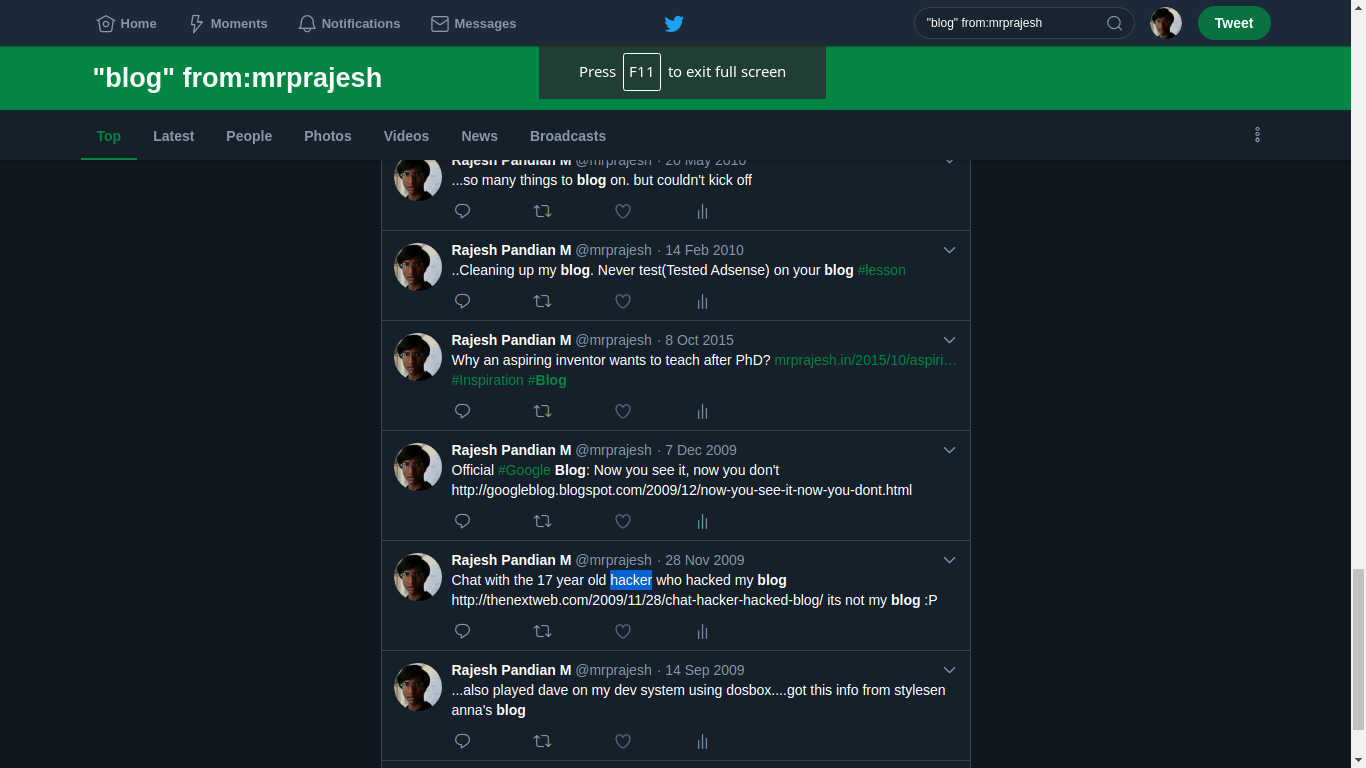
Most often I would want to refer some of my old tweets. By old I meant 2-4 years back. I was unsure until someday, I learnt about this twitter advanced search.

https://twitter.com/search-advanced

The Search window


In here I can user my handle From these accounts: mrprajesh
Then search for one or two word. This very handy. This what happen when tried to find blog keyword from my old tweets.


Yay!!
See you, tata.

Monday, July 15, 2019

How to build Green-Marl on Ubuntu 18.04 or later / Linux Mint 19

The offcial Green-Marl from Stanford is old at least 5 years(as on date). The master branch is not able to build/make sucessully. There were some errors and build got failed. Fortunately, I saw a pullrequest #132 by Reto Achermann @achreto and it works like charm.

$ mkdir achretoGreenMarl && cd achretoGreenMarl
$ git clone https://github.com/achreto/Green-Marl.git .
$ cd achretoGreenMarl
$ make

That's it. It works fine. You could check.

$ cd achretoGreenMarl/bin
$ ./gm_comp  -v
lib this = 0x5653e0f5dde0
version 0.3.0

TaTa bye.

what is green-marl? see this

The below was the error when building from https://github.com/stanford-ppl/Green-Marl

collect2: error: ld returned 1 exit status
Makefile:196: recipe for target '../bin/gm_comp' failed
make[1]: *** [../bin/gm_comp] Error 1
make[1]: Leaving directory '/home/rajz/d7/Green-Marl/src'
Makefile:49: recipe for target 'compiler' failed
make: *** [compiler] Error 2

Thursday, April 25, 2019

LaTeX Tips for writing good research article.

// Purely out of my experience(learnt from friends and experts) of using LaTeX
// for writing a good research article collaboratively; good -- In my view!
// good - easy for others to edit;


- use multiple src files and input in the main tex.
- - do not write the everything in a single file.
- - Prior to Overleaf this is modular. But even after this. it is a good practice.
e.g

\input{0ABS.tex}
\input{1INT.tex}
\input{3ALG.tex}

or  keep everything in a folder as well
\input{src/0ABS.tex}
..


- Use Overleaf is plain, simple and speeds up writing .
- - Good for collab; two persons can edit the same file simultaneously.
- - Enough of messing around with errors in texmaker[TM]/texstudio[TS]; bored of it!
- - Double click the pdf it will take you to the line or para(most of the time)!
- - Auto spell check // Never worked well TM


- User labels at a appropriate place(section, figure, subsection) with some standard form; prefix code
     \label{ intro}
e.g
     \label{fig description figure}
      I use codes ={sec, ssec, fig, table, alg, line, etc}

- Using ref and cite
- - Use it ~\ref{} or ~\cite{} so that it stays together with previous word.
- - \cite{r1,r2,r3...} can hold more than one args

- Use separate folder for fig and plot you generate.
- - Include all the source for creating image in case you wanted edit later.
- - I use Latex draw and export as pdf+cropped and include it in figure.
- - I use  pgPlot and Libre office calc for generating plots.

- Use BibTeX; User STD form in
- - use  \bibliography{GlobalBibtex} for file name GlobalBibtex.bib
- - can add mutiple bib file \bibliography{file1,file2}
- - Last name of first author and initials of rest(if any)
- - User _ write the name of paper you will calls as or would like remember as
- - overleaf can match it when citing with the name(after _) as well
- - It is always good to have your own global bibtex file
- - You ca cumulatively add(and maintain!) it as you write more.
- - Aid sin searching for bib entry in the bib file of you previously written papers.
- - Use only Conference verion of the  bib rather than a arviv if you have both.
- - Use DBLB for collection because it is nice search. You coul use others as well - but be uniform.
- - It will be nice if the bib entry has a doi/url
- - So the reader can quickly go to the ref paper in single click from the ref section.
- - Saves a lot of time in googling and find the right version(if multiple (re)versions exist), etc, etc,
- - Sometimes the CAPS may not rendered properly either in title/author name. You would have enclose those inside braces {} to force the capitalization in tact.

// I am updating these over the course of time.
Last Update: 14-Sep-2019

Monday, March 18, 2019

How to make your commits signed or verified in Github

DIY Steps
========
1. Create a GPG key (public and private key) and add it into passwords and keys (seahorse).

2. Add your GPG keys into Github
3. Create your SSH keys
ssh-keygen -t rsa -b 4096 -C "YOUR EMAIL@GMAIL.com"
// Remember the  passphrase it is essential to verified/sign
4. make sure that it is visible on your "passwords and keys"

5. Then On your terminal
cat ~/.ssh/id_rsa.pub

copy paste its content to Github

6. Set some git config if yor have not done earlier


7. That's it. Whenever you make a commit and push you will get a promt asking for pass phares (in step 3) and github credentials as usual respectively.

TADA

YOUR commits are now verified !!

Last Post !! Moved to new site

As I am getting old 😋, it seem like I can not remember many of my earlier tech encounters. This is the place I was logging so that I refer ...